< Intro To .NET Remoting Technology | Main | The VB .NET Remoting program example >
Chapter 12 Part 2:
.NET Remoting
What do we have in this chapter 12 Part 2?
-
The C# .NET Remoting Program Example
-
Creating the C# Demo Class Library (DLL)
-
Creating the C# Server Console Application
-
Creating the C# Client Program
-
Testing the Whole .NET Remoting C# Program Sample
|
|
The C# .NET Remoting Program Example
Creating the C# Demo Class Library (DLL)
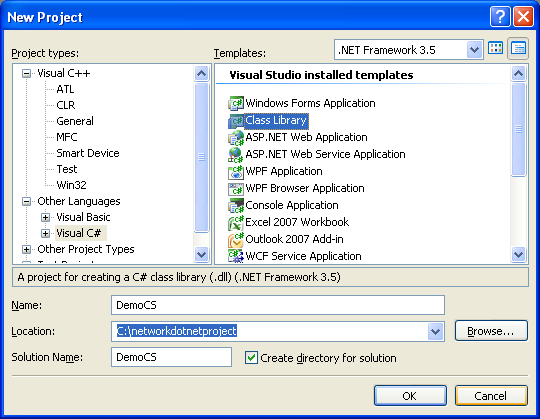
Create a new C# class library and you can use the project and solution names as shown in the following screenshot.
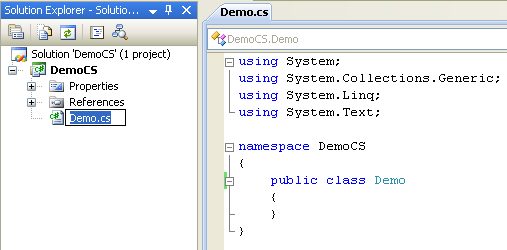
Rename the source file to Demo to reflect the application that will be developed. |
Add/edit the code as given below. As stated in the comment, the DemoClass tries to demonstrate the Marshal reference while the use of Serialize attribute indicates Marshal by value in .NET remoting.
|
using System;
namespace DemoCS { /// <summary> /// DemoClass is a very simple class that demonstrates Marshal by Value and /// Marshal by Reference in .Net remoting. /// </summary> /// [Serializable] // for Marshaling by value public class InformationBucket { public int Value; public string Message; }
// for Marshaling by reference public class DemoClass : MarshalByRefObject { private int Value = 0; private string Message = "";
// method for setting a value public void SetValue(int InputValue) { Value = InputValue; Console.WriteLine("Demo class: Setting Value to {0}", InputValue); }
// method for displaying a message public void SetMessage(string InputMessage) { Message = InputMessage; Console.WriteLine("Demo class: Setting Message to {0}", InputMessage); }
public InformationBucket GetCurrentInformation() { InformationBucket Bucket = new InformationBucket();
Bucket.Message = Message; Bucket.Value = Value;
return Bucket; } } } |
Build the project and make sure there is no error.

The DLL file should be generated and ready for use.

Creating the C# Server Console Application
Create new C# console application. You can use the project and solution names as shown in the following screenshot. This server program should be deployed on the server side in the real deployment.

Add/edit the code as given below. The communication detail such as protocol, port number and the DLL to be searched and loaded is stored in the servercs.config file which will be created later.
|
using System; using System.Runtime.Remoting;
namespace ServerCS { /// <summary> /// ConfigFileRemotingServer /// </summary> class ConfigFileRemotingServer { /// <summary> /// Demonstrates how to develop a server to sponsor a remote object /// </summary> [STAThread] static void Main(string[ ] args) { Console.WriteLine("Server: Reading the config file..."); RemotingConfiguration.Configure(@"..\..\servercs.config", false);
Console.WriteLine("Server: I'm ready, press return to exit the server"); Console.ReadLine(); } } } |

Add new item, the config file.

Select the Web Configuration File template and type the file name, servercs.

Add the following schema settings at the end of the file just before the </configuration> tag. The remoting schema details can be found in Remoting Settings Schema.
|
<system.runtime.remoting> <application> <service> <activated type="DemoCS.DemoClass, DemoCS" /> </service> <channels> <channel ref="tcp" port="5150" /> </channels> </application> </system.runtime.remoting> |

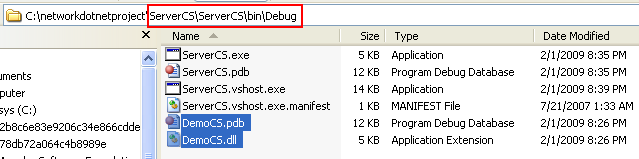
Next, as set in the servercs.config file, we need to store the DemoCS DLL binary in the server’s \bin\Debug project folder so that the server program can find it. Copy all file under the DemoCS\bin\Debug folder. Take note that the DemoCS DLL is a Debug version.
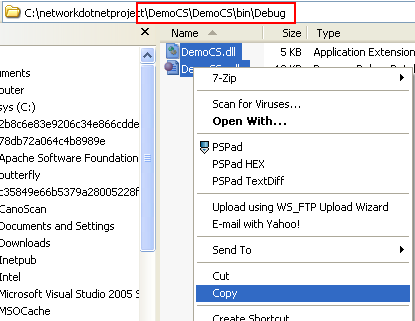
Paste the copied files into the ServerCS\bin\Debug folder.
Then, we are ready to run this server program. Run the project without debugging.

Unblock the firewall if any.
|
|
|

The following screenshot shows the server program is ready for the client communication with remoting call.

Creating the C# Client Program
Create a new C# console application. You can use the solution and project name as shown in the following screenshot.
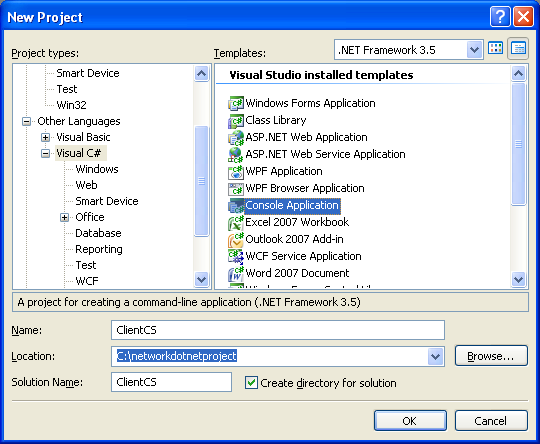
Rename the default given source file to ClientCS.cs to reflect the application to be developed.

Add/edit the code as given below. This client program read two inputs: an integer (int) and a message (string) from the command line. Later, we need to run this program from the command line.
|
using System; using System.Runtime.Remoting;
namespace ClientCS { /// <summary> /// ClientCS /// </summary> class ClientCS { /// <summary> /// ClientCS is a simple .Net remoting application that demonstrates /// how to configure .Net remoting via configuration files and also shows /// how to perform both marshal by reference and marshal by value. /// </summary> [STAThread] static void Main(string[ ] args) { // Test if input arguments were supplied: if (args.Length == 0) { System.Console.WriteLine("Please enter a numeric value followed by a message!"); System.Console.WriteLine("Example: <program_name> 111 \"Remoting: Some string from client sent to Demo class \n then displayed on Server\""); return; }
Console.WriteLine("Client: Reading the config file..."); RemotingConfiguration.Configure(@"..\..\clientcs.config", false);
System.Console.WriteLine("Client: Instantiating the DemoClass object..."); DemoCS.DemoClass MyDemo = new DemoCS.DemoClass(); // The following call demonstrates marshal by reference // because we set a numeric value on the server from the client. System.Console.WriteLine("Client: DemoClass object - Setting the value..."); MyDemo.SetValue(int.Parse(args[0])); // The following call also demonstrates marshal by reference // because we set a string value on the server from the client. System.Console.WriteLine("Client: DemoClass object - Setting the message..."); MyDemo.SetMessage(args[1]); // The following call also demonstrates marshal by value because // we retrieve a serializable object named InformationBucket // from the server and get a copy to access on the client. System.Console.WriteLine("Client: DemoClass object - getting the current info..."); DemoCS.InformationBucket IB = MyDemo.GetCurrentInformation();
Console.WriteLine(); Console.WriteLine("Client: The message is: " + IB.Message); Console.WriteLine("Client: The value is: " + IB.Value.ToString()); } } } |
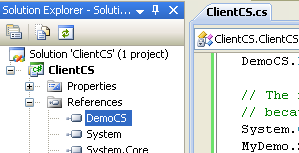
Next, the DemoCS class library need to be resolved by adding a reference to the DLL.

Invoke the Add Reference page.

From the Browse page of the Add Reference, find and select the DemoCS.dll which is under the \bin\Debug folder. Click OK to add the reference.

The reference should be visible under the References folder of the Solution Explorer.
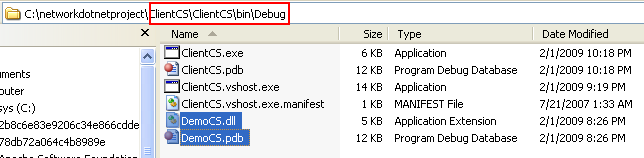
By adding a reference from the project in the Visual Studio, the DLL and related files automatically copied to the destination \bin\Debug folder as can be verified and seen in the following screenshot. When we rebuild the DLL project, the new updated DLL will also be updated when we rebuild the client program.
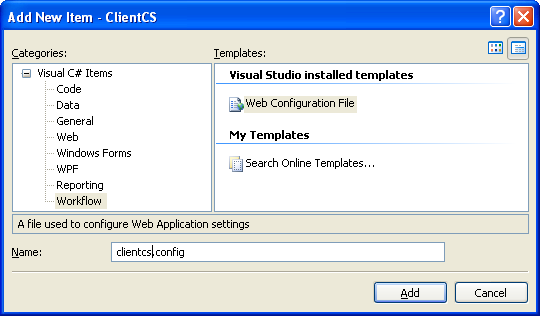
Next, add the config file for the client program. Invoke the Add New Item page.

Select the Web Configuration File template and you can use the name as in the following screenshot if you want.
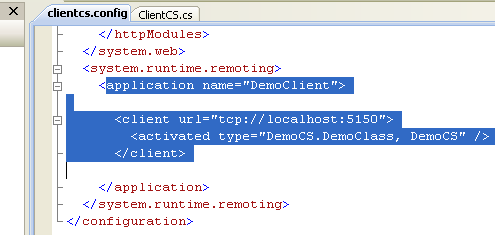
Add the following schema settings at the end of the file, just before the </configuration> tag. The detail of configuration schemas can be found in Remoting Settings Schema.
|
<system.runtime.remoting> <application name="DemoClient">
<client url="tcp://localhost:5150"> <activated type="DemoCS.DemoClass, DemoCS" /> </client>
</application> </system.runtime.remoting> |

Next, we are ready to build this client program. Build the program and make sure there is no error.

Run the program without debugging.

The following shows the client output sample. We need to run this program from the command prompt while the server program is running.

Testing the Whole .NET Remoting C# Program Sample
Firstly, open the server program in Visual Studio and run it without debugging. The output for the server program is shown below. Leave the server program running.

Then, run the client program from the command prompt with a sample integer followed by a message as the arguments. The following screenshot shows the sample output.

And the previous server output is shown below indicating a communication has taken place with remoting feature.

To reconfirm the communication is really happens (because we are testing the whole program on the localhost), you can launch the netstat program from another Windows console while running the server and then the client programs. The following shows the netstat command and its sample dump used while running the previous server and client programs. The netstat command takes snapshot for all info every 5 seconds. Get more netstat info by typing netstat ?.
C:\>netstat -a 5

With some modification to the client and the server config files (URL, protocol and port number) and deploying the server program on the designated web server, you can test the whole program in the real network, private or public.