< Creating the C# UDP Remoting Channel Class Library (Cont) | Main | Chap 13 TOC: .NET Framework Network Security >
Chapter 12 Part 9:
.NET Remoting
What do we have in this chapter 12 Part 9?
-
Creating the C# Custom Remoting Channel Demo Class Library
-
Creating the C# Remoting Server Program
-
Creating the C# Remoting Client Program
-
Testing the Whole UDP Custom Made Channel Remoting Project
|
|
Creating the C# Custom Remoting Channel Demo Class Library
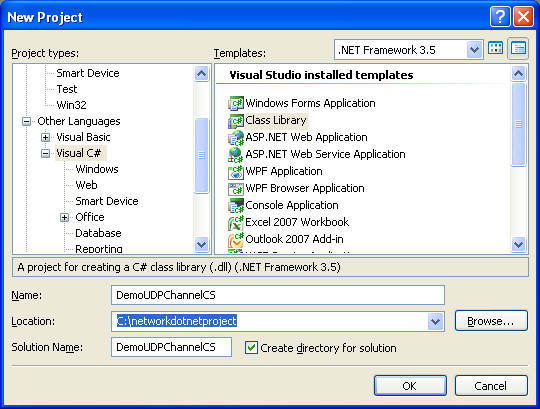
Create a new C# class library and you may want to use the solution and project name as shown in the following screenshot.
Rename the given default source file name to Demo.cs to reflect the application to be developed. |

Add/edit the code as given below. This class demonstrates the Marshal by value and reference.
|
using System; using System.Diagnostics;
namespace DemoUDPChannelCS { /// <summary> /// Summary description for Class1. /// </summary> [Serializable] public class InformationBucket { public int TheValue; public string Message; }
public class DemoClass : MarshalByRefObject { private int TheValue = 0; private string TheMessage = "";
public void SetTheValue(int InputValue) { TheValue = InputValue; Console.WriteLine("DemoClass: Setting TheValue to {0}", TheValue); }
public void SetTheMessage(string Message) { TheMessage = Message; Console.WriteLine("DemoClass: Setting TheMessage to {0}", TheMessage); }
public InformationBucket GetCurrentInformation() { InformationBucket Bucket = new InformationBucket();
Bucket.Message = TheMessage; Bucket.TheValue = TheValue;
return Bucket; } } } |
Build the project and make sure there is no error.

The following example shows the build messages sample. The DLL was successfully generated.
------ Rebuild All started: Project: DemoUDPChannelCS, Configuration: Debug Any CPU ------
c:\WINDOWS\Microsoft.NET\Framework\v3.5\Csc.exe /noconfig /nowarn:1701,1702 /errorreport:prompt /warn:4 /define:DEBUG;TRACE /reference:"C:\Program Files\Reference Assemblies\Microsoft\Framework\v3.5\System.Core.dll" /reference:"C:\Program Files\Reference Assemblies\Microsoft\Framework\v3.5\System.Data.DataSetExtensions.dll" /reference:c:\WINDOWS\Microsoft.NET\Framework\v2.0.50727\System.Data.dll /reference:c:\WINDOWS\Microsoft.NET\Framework\v2.0.50727\System.dll /reference:c:\WINDOWS\Microsoft.NET\Framework\v2.0.50727\System.Xml.dll /reference:"C:\Program Files\Reference Assemblies\Microsoft\Framework\v3.5\System.Xml.Linq.dll" /debug+ /debug:full /filealign:512 /optimize- /out:obj\Debug\DemoUDPChannelCS.dll /target:library Demo.cs Properties\AssemblyInfo.cs
Compile complete -- 0 errors, 0 warnings
DemoUDPChannelCS -> C:\networkdotnetproject\DemoUDPChannelCS\DemoUDPChannelCS\bin\Debug\DemoUDPChannelCS.dll
========== Rebuild All: 1 succeeded, 0 failed, 0 skipped ==========
Creating the C# Remoting Server Program
Create a new C# console application and you may want to use the solution and project names as shown in the following screenshot.

Rename the default given source file to Servercp.cs to reflect the application to be developed.

Next, let add references to both the demo and UDP custom made channels for remoting. Invoke the Add Reference page.

From the Browse page, find and select the UDPChannel.DLL which normally under the project’s \bin\Debug folder. Click OK to add the reference.

Then add a reference to the demo DLL class.


Both references should be visible in the Solution Explorer under the References folder.

Add/edit the server code as given below.
|
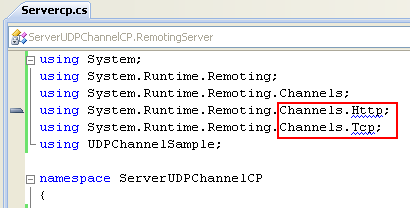
using System; using System.Runtime.Remoting; using System.Runtime.Remoting.Channels; using System.Runtime.Remoting.Channels.Http; using System.Runtime.Remoting.Channels.Tcp; using UDPChannelSample;
namespace ServerUDPChannelCP { class RemotingServer { /// <summary> /// The main entry point for the application. /// </summary> [STAThread] static void Main(string[ ] args) { UDPChannel Channel = new UDPChannel(5150); // ChannelServices.RegisterChannel(Channel); ----> obsolete ChannelServices.RegisterChannel(Channel, false); ActivatedServiceTypeEntry myActivatedServiceTypeEntry = new ActivatedServiceTypeEntry(typeof(DemoUDPChannelCS.DemoClass)); RemotingConfiguration.RegisterActivatedServiceType(myActivatedServiceTypeEntry); // Get the registered activated service types . ActivatedServiceTypeEntry[ ] myActivatedServiceEntries = RemotingConfiguration.GetRegisteredActivatedServiceTypes();
Console.WriteLine("Information of first registered activated service type :"); Console.WriteLine("Object type: " + myActivatedServiceEntries[0].ObjectType); Console.WriteLine("Description: " + myActivatedServiceEntries[0].ToString()); Console.WriteLine("Hit any key to exit..."); Console.ReadLine(); } } } |
If you face the problem resolving the Http and Tcp namespaces from the System.Runtime.Remoting.Channels namespaces, you need to add the reference manually as done before. This is bug or what we are not sure, because it also happened in Visual Studio 2005 full or Express edition.
Invoke the Add Reference page.

From the .NET page, browse and find the System.Runtime.Remoting namespaces and click OK.

Next, build the project and make sure there is no error else you need to correct it.
If there is no error, run the project without debugging.

Unblock the Windows firewall if any.
|
|
|

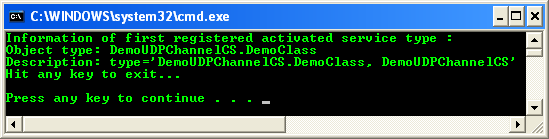
The following screenshot show a sample server output, waiting a connection from client while implementing the remoting with custom made UDP channel. We need a client program to test the whole project.
Creating the C# Remoting Client Program
Create a new C# console application and you may want to use the solution and project names as shown in the following screenshot.

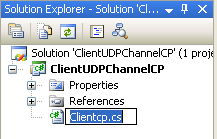
Rename the default given source file name to Clientcp.cs to reflect the application to be developed.
As done in the server program, let add references so that all the reference to the UDP custom made channel definition and demo DLL classes can be resolved. Invoke the Add Reference page.

From the Browse page, find and select the UDPChannel.dll, previously created file which normally located under the project’s \bin\Debug folder.

Then repeat the same steps for the DemoUDPChannelCS.dll file.

Both references should be visible under the References folder in the Solution Explorer.

Next, add/edit the code as given below.
|
using System; using System.Runtime.Remoting; using System.Runtime.Remoting.Channels;
namespace ClientUDPChannelCP { class RemotingClient { /// <summary> /// This is a simple remoting client application that uses the UDP /// remoting channel to communicate to the DemoClass. /// </summary> [STAThread] static void Main(string[] args) { // Remoting Configuration UDPChannelSample.UDPChannel Channel = new UDPChannelSample.UDPChannel(); // ChannelServices.RegisterChannel(Channel); --- obsolete ChannelServices.RegisterChannel(Channel, false);
ActivatedClientTypeEntry myActivatedClientTypeEntry = new ActivatedClientTypeEntry(typeof(DemoUDPChannelCS.DemoClass), "udp://loopback:5150");
// Register DemoClass on the client end so that it can be activated on the server. RemotingConfiguration.RegisterActivatedClientType(myActivatedClientTypeEntry); DemoUDPChannelCS.DemoClass DoDemo = new DemoUDPChannelCS.DemoClass(); DemoUDPChannelCS.DemoClass DoDemo1 = new DemoUDPChannelCS.DemoClass();
DoDemo.SetTheMessage("Client: Hello There!"); DoDemo1.SetTheMessage("Client: Hello Again!");
DoDemo.SetTheValue(77); DemoUDPChannelCS.InformationBucket Bucket1 = DoDemo.GetCurrentInformation();
DoDemo.SetTheMessage("Client: We are still here."); DoDemo.SetTheValue(717);
DemoUDPChannelCS.InformationBucket Bucket2 = DoDemo.GetCurrentInformation();
Console.WriteLine("Client: Bucket1 has the value {0} and message {1}", Bucket1.TheValue, Bucket1.Message); Console.WriteLine("Client: Bucket2 has the value {0} and message {1}", Bucket2.TheValue, Bucket2.Message); } } } |
Build the client project and make sure there is no error.

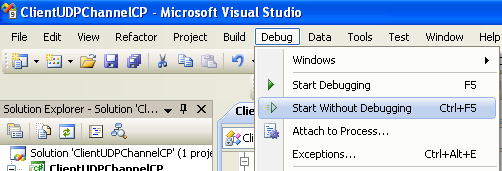
Then, run the project without debugging.
Well, if you encounter the following error when running the client program:
...An address incompatible with the requested protocol was used...
Please uninstall or disable the IPv6 protocol on your machine temporarily using the Local Area Network Properties page as shown below. This example project was developed for IPv4 while Windows XP Pro SP2 already supported IPv6 and enabled by default in most machines.

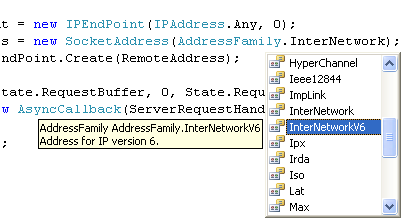
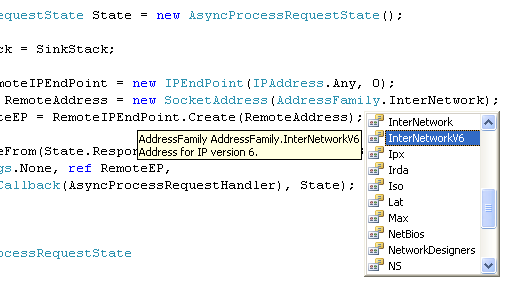
In the real development, you may need to modify the AddressFamily to IPv6 (or other desired address family) or provide auto detection for both IPv4 (InterNetwork) and IPv6 (InterNetworkV6) address families as normally done. The code portion of this issue is shown in the following screenshots which in this case, can be found in the UDPChannel.cs, UDPServerChannel.cs and UDPClientChannel source files.
The following screenshot shows the client program output with exception thrown because there is no listening server for the defined channel and port number.

Testing the Whole UDP Custom Made Channel Remoting Project
Firstly open the server program, run it and leave the program in running mode. The server should be in the listening mode for client connection.

Then, open a new instance of Visual Studio, open and run the client program.

The following shows the previous server output sample which the client was run two times. You may want to test this client and server program on different computer in a subnet or different subnet whether in the private or public network.
